
Date: Nov. 13, 2020
As production time increases, various issues inevitably arise with the vibrating screen, or adjustments to the vibration amplitude may be required. If you are unfamiliar with the installation or debugging of its components, making these adjustments can be difficult. This article outlines the operating procedures for six common scenarios.
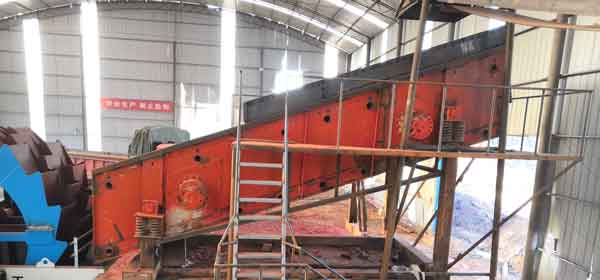
Increasing the amplitude benefits solid-phase transportation and boosts processing capacity, whereas reducing it extends the lifespan of the screen mesh and vibrator bearings. To modify the amplitude, follow the steps below.
1) Turn off the power supply.
2) Remove the protective cover from the vibrator.
3) Rotate the outermost weight in each pair of balance weights on the vibrator shaft to alter the exciting force generated by the vibrator.
4) Position the balance weights at the same percentage of maximum excitation force and lock the eccentric weights.
The factory’s electrical system is equipped with an independent overload protection device, which interlocks the two vibrators to prevent equipment damage in the event of a single vibrator failure.
1) Apply sealant to the mating surfaces of the wiring port threads and the motor junction box to prevent water ingress during operation.
2) Seal the inlet at the bottom of the switch to prevent moisture from entering and causing rust on moving parts if the vibrating screen remains unused for extended periods after leaving the factory.
3) Ensure that the wiring at the vibration motor connection ports is securely tightened to avoid cable fatigue and fracture caused by intense vibration.
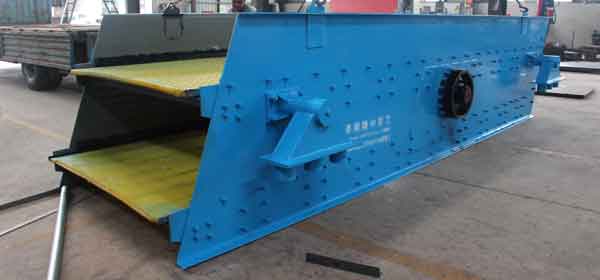
Machine shutdown is not required when adjusting the angle of the screen box. Follow the steps below.
1) Pull out the plug.
2) Turn the handwheel; the adjustment device will move up and down. Once the screen box angle is adjusted, insert the pin.
3) Continue to turn the hand-wheel to move the moving part down, so that the bolt is stressed, and the internal lead screw is not bent due to the force.
4) Adjust the other side so that the angle on both sides is the same.
Since the sliding surface of the angle adjustment device is exposed, the grease must be added frequently to avoid rust.
1) When loosening the tension bolts that fasten the screen, do not remove the nuts; rotate the tension bolts 90° to make the flat square withdraw from the long hole of the screen hook plate, and then take out the screen, hook the plate, and remove the screen.
2) When tensioning the screen, make the left hook plate in a vertical position, tighten the right screen hook plate, and then tighten the left tension bolts. The screen and the screen frame should vibrate synchronously, with no separation.
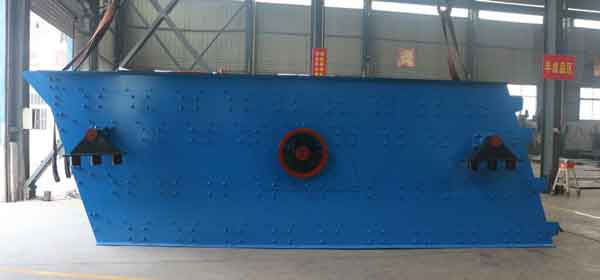
After the vibrating screen has been operating for 2 months, each bearing on the vibrator should be lubricated once, with approximately 10g of grease added to each bearing grease nozzle. Excessive grease may enter the motor windings and affect coil heat dissipation.
When replacing the vibration motor, it is essential to understand its internal structure. The eccentric block configuration of the S250 translational elliptical vibrating screen’s vibration motor differs from that of standard motors; specifically, the eccentric blocks on both sides are not aligned at the same angle. Therefore, before removing the old motor, open the motor shield and carefully study the installation position of the eccentric blocks according to the manual.
When installing the vibration motor onto the screen box, ensure that the eccentric blocks at both ends of the motor shaft are not in the same radial direction but are installed at a specific angle. The upper and lower eccentric blocks have a phase angle of 45°, and the motor structures on the left and right sides are mirrored opposites.
Previous:none
Next:Choosing A Screening Machine Doesn’t Have To Be Hard. Read These 3 Tips
Please enter your inquiry and contact. We will reply you as soon as possible.
We are here for your questions anytime 24/7, welcome your consultation.
The latest sand washer price.
Installation and maintenance.
Screening
Sand Washing Machines
Sludge Treatment
Sand Recycling Machines
Address: Shuangyue Road, Changdai Town, Mengjin County, Luoyang, China
Email: export@lylzzg.com
Tel: +86-18736301510


 日本語
 Русский
 中文
 Español
 Français
 Português
 العربية
 Tiếng Việt
 Deutsch
 한국어
 Türkçe
 বাংলা
 हिन्दी
 Bahasa Melayu
 Kiswahili